Chino Wood Flooring handles hardwood floor repair in Chino, CA, bringing more than 20 years of wood floor experience to damaged, loose and stained floors, and serving surrounding cities including Eastvale, Chino Hills, Ontario, Montclair and Norco. We repair the floor you already have rather than replacing it whenever the wood is worth saving.
A repair starts by finding out why the damage happened. A cupped board, a squeak, a gap or a stain is a symptom, and fixing the surface without fixing the cause brings the problem back. We check for leaks, measure moisture, look at the subfloor and, where insects are involved, confirm treatment first.
Then we match what is there: species, width, thickness, grade and finish. A repair that stands out from the rest of the floor is only half done, so we plan the blending before cutting out a single board.
Common Hardwood Floor Damage
Cupping and Crowning
When board edges rise higher than their centers, the floor is cupping; when the centers rise, it is crowning. Both come from moisture moving unevenly through the wood. We measure the moisture across the affected area and find the source, whether it is a plumbing leak, a slab problem or a humid crawlspace, before deciding what to repair.
A cupped floor may flatten once it dries, so we often wait and recheck before sanding. Sanding while the edges are still high leaves crowns once the wood settles.
Buckling and Lifted Boards
Buckling is when boards lift away from the subfloor altogether, usually after a flood or a slow leak. Boards that have buckled are usually too distorted to relay, so we remove them, dry the subfloor, and install new boards. We also check the expansion gap at the walls, since a floor with no room to move can buckle from normal humidity changes.
A missing expansion gap is a common hidden cause. When a floor is butted tight against walls, cabinets or a fireplace hearth, the boards have nowhere to go as they swell, and they push upward instead. We pull baseboard in the affected area to look, and trim the perimeter where needed so the repair does not buckle again.
Gaps Between Boards
Small gaps that open in dry months and close in humid months are normal. Wide gaps that stay open usually mean the boards were installed too wet or were damaged by water and then dried out. We fill seasonal gaps only in the finish, and repair or replace boards where the gaps are permanent.
Some gaps have a single, local cause: a floor register blowing warm, dry air across the same boards, or a sunny patch in front of a sliding door. Those boards shrink more than the rest of the room. We look for that kind of pattern before recommending filler, because correcting the source keeps the repair tight.
Board Replacement and Blending
Weaving in New Boards
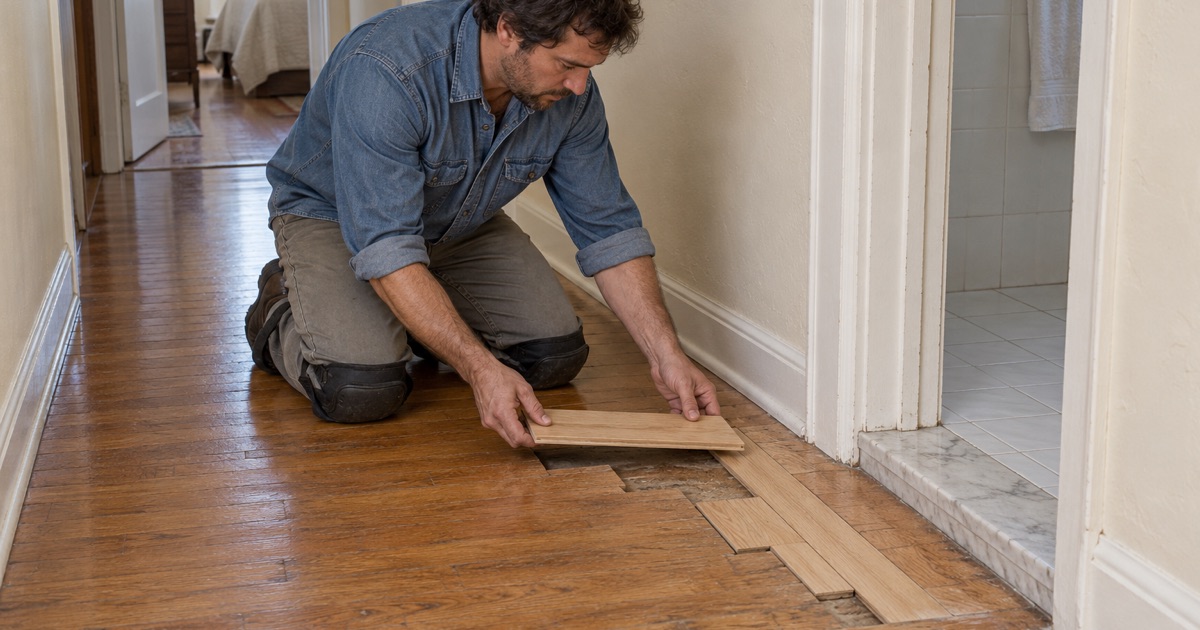
We cut out damaged boards along their length, remove the pieces without damaging the tongue and groove of their neighbors, and weave in new boards with staggered end joints. The replacement boards are face-nailed or glued where needed and then sanded flush with the floor. Done correctly, the repair follows the original layout and does not form a visible square.
On glue-down engineered floors the method changes. We cut the damaged board out in sections, clean the old urethane flooring adhesive from the slab, and glue in a replacement with its bottom groove lip trimmed so it drops into place. The new board is weighted until the adhesive sets so it sits level with its neighbors.
Matching Species, Width and Grade
Red oak, white oak, maple and hickory each have their own color and grain, and plank widths vary from floor to floor. We match all of these, including the cut, such as plain sawn, rift sawn or quartersawn. When the exact product is no longer available, we can borrow boards from a closet and replace those with new stock where they will not be seen.
Blending the Finish
New wood is lighter than old, and older finishes have ambered over time. For the best match, we usually refinish the whole room or run the new finish to a doorway or natural break. For smaller repairs, we blend stain and finish on the new boards to match the old floor as closely as possible.
Prefinished floors add a complication: the factory finish cannot be copied exactly on site. When the original product can still be bought, we use it; when it cannot, we explain the tradeoff between a close match on a few boards and sanding the room so everything wears the same site-applied finish.
Squeaks, Soft Spots and Loose Boards
Squeaky Floors
Squeaks come from boards rubbing together or from loose fasteners and subfloor panels moving against the floor joists. We locate the squeak, then fasten the subfloor from below where there is access, or from above with small concealed fasteners. The goal is to stop the movement, not just to lubricate the noise.
On a second story, access from below usually means opening a ceiling, so we work from above. Special repair kits drive a scored screw through the board into the joist and snap it off below the surface, leaving a small hole we fill with color-matched wood filler. The squeak stops without replacing boards.
Soft Spots and Subfloor Damage
A spot that gives underfoot usually means the subfloor has been damaged by water or has separated from the joists. We open the floor, repair or replace the damaged subfloor, and relay the boards. Leaving a soft spot lets the damage spread and can crack the boards above.
Hollow Spots in Glue-Down Floors
On a slab, a hollow sound means the adhesive has lost contact with the concrete. Small areas can be injected with adhesive through tiny holes; larger ones need the boards lifted and reset. We check the slab moisture in those areas first.
Hollow spots often cluster near doorways, along walls, or where the slab has a high or low spot. A hollow area that keeps growing points to moisture or a failing bond across the floor, while a few stable spots can simply be left alone or injected. We map them so you can see the pattern and decide.
Stains, Insects and Surface Damage
Pet Urine and Water Stains
Pet urine can turn oak black as it reacts with the wood, and those stains are often too deep to sand out. We test sand a spot, and if the stain remains, we replace the affected boards. That also removes the odor, which usually stays in the wood.
Urine often travels along the joints into the subfloor as well. When the odor stays after board replacement, we check the subfloor under the stain and seal or replace that section. Treating the surface alone while the subfloor is still soaked brings the smell back on the first humid day.
Drywood Termites and Powderpost Beetles
Drywood termite frass looks like small pellets along the baseboard, and powderpost beetle damage shows as tiny round holes. Treatment comes first, from a licensed pest control operator. Afterward we remove every damaged board and replace it so no weakened wood stays in the floor.
The damage is often wider than it looks. Termites and beetles tunnel along the grain inside a board that still has an intact surface, so we probe the boards around each exit hole or frass pile before deciding how far to cut. Replacement boards are matched and then finished with the rest of the room.
Scratches, Gouges and Dents
Light scratches often disappear with a screen and recoat. Deeper gouges and dents from dropped objects may need a board replaced, depending on depth and location. We judge each one rather than recommending a full refinish for every mark.
Furniture and pets cause most surface damage. Felt pads on chair legs, trimmed claws and walk-off mats at exterior doors prevent the most common marks. We leave you with care notes for your specific finish so the repair lasts.
- 20+ Years of Wood Flooring
- Slab Moisture Tested First
- Free Written Estimates